|
|
Post by gold94corolla on Aug 22, 2014 22:36:00 GMT -5
|
|
|
|
Post by gold94corolla on Aug 26, 2014 21:44:53 GMT -5
Took some pics of the head lights since there were pretty good roads out there with almost no one on them. Low beams are stock reflectors, regular ballasts, and Osram 5000k Cool Blue Intense bulbs.  High beams are 4300k bulbs with Denso ballasts.  again   In GIF format   oops  UFOs UFOs by gold94corolla, on Flickr |
|
|
|
Post by gold94corolla on Sept 10, 2014 20:39:30 GMT -5
Thanks guys! Update time. I ordered two brand new painted fenders last night, as well as two complete doors that I will have to paint myself. More (old) pics. I'm planning to redo the interior, since the dashboard finish is deteriorating rapidly (infamous sticky dash problem). Gonna get a 2001 dashboard because it doesn't have this problem, then paint the trim gloss black with clear coat. I will also be doing a dash kit, so I ordered some samples from CARID.com.  Dash Kit Samples Dash Kit Samples by gold94corolla, on Flickr  Dash Kit Samples Dash Kit Samples by gold94corolla, on Flickr I originally wanted the blue and black carbon fiber finish (to go with the new blue-stitched shifter knob), but since it's real carbon fiber, you can only see the blue in one direction. And the all-blue carbon fiber is simply way too dark. Real carbon fiber is nice, but overdone. And the chrome came out as a flat mirror, not rounded like the others. But I really like the black/gray zebra wood finish (in the corner), it has the darkish look of carbon fiber, but it unique. Gonna go with that whenever I get to it lol. Next up was fender work. Since I was going to order new fenders, I wanted to roll them properly this time. So I got a fender roller on Ebay for $105.  Fender Roller Fender Roller by gold94corolla, on Flickr I used it well enough, but since the fenders were already wrecked, this didn't do anything to help that. New fenders will be good though, since the metal will be evenly modified all around.  Fender Roller Fender Roller by gold94corolla, on Flickr I was able to get all 4 fenders rolled/pulled even more though, which eliminated any kind of occasional rub I had. I also messed with the bumper/fender alignment to make it smoother looking, like the car was naturally wider from the factory.  Front Fenders Rolled Front Fenders Rolled by gold94corolla, on Flickr  Rear Fenders Rolled Rear Fenders Rolled by gold94corolla, on Flickr Oh, and the front lip is back on, since I hated how it looked without anything.  Front Lip Installed Front Lip Installed by gold94corolla, on Flickr washed  Car Washed Car Washed by gold94corolla, on Flickr I also bought this fender finisher, but I don't know if I'll need it on the new fenders. Bought it just in case I need to do minor adjustments. It was only $30 lol.  Eastwood Fender Finisher Eastwood Fender Finisher by gold94corolla, on Flickr Finally, I happened to find a random windshield repair kit in Walmart, so I bought it and had a go. Not bad for my first try. You can still see a little part of the outline, I don't think I used enough resin. But the chip was about the size of a nickel inbetween the two layers of glass. This looks 100 times better than before lol. After I took this pic, I finished the job by filling the hole in the middle.  Windshield Chip Repair In Progress Windshield Chip Repair In Progress by gold94corolla, on Flickr |
|
|
|
Post by gold94corolla on Sept 10, 2014 21:09:09 GMT -5
In the effort of catching up, you get 2 updates in one day lol. My front DRL switch that I had since the Corolla fried on a pothole somehow, so I had to look for a replacement. Jeez it's impossible to find a simple rectangle switch. But I remembered these guys: www.otrattw.net/home.php Figured I'd give it a shot and see what happened. I first ordered 2 switches, one for the front lights, and one for the tail lights that I was working on finishing. Switches have a natural location right to the left of the steering wheel. The switches were slightly too big to fit, so I had to shave off the inner edge of the switch openings to make them fit, and I had to grind a slight amount off of the bottom of the switches. Out with with the old, in with the new:  Switch Installation Preparation Switch Installation Preparation by gold94corolla, on Flickr wow they look incredible  Installed Switches Installed Switches by gold94corolla, on Flickr Wiring was kind of a pain though, since the switches do not have wire harness, but instead, have individual pins. But I got some female wire crimp ends and went to town. Each of these switches has 5 wires... 2 grounds and 2 hots for the 2 individual blue LEDs, and one output.  Switch Wiring Switch Wiring by gold94corolla, on Flickr Done and working! The switches match the OEM finish EXACTLY and look perfectly at home there!  Switches Installed Switches Installed by gold94corolla, on Flickr When I turn the key to start the car, the top section lights up blue  Switches Lit Switches Lit by gold94corolla, on Flickr And then when I flip the switch to the on position, the bottom indicator lights up to tell me that it's on.  Switches On Switches On by gold94corolla, on Flickr These switches have a nice "action" to them, they have a very solid click feeling when rocking them on or off.  Switches Off Switches Off by gold94corolla, on Flickr  Switches Lit Up Switches Lit Up by gold94corolla, on Flickr  Switches On Switches On by gold94corolla, on Flickr Now that I had those 2 switches in, it was obvious that I had to find a third switch that would somehow control the brightness of the HID head lights (that's what the middle rotary switch does). The old switch has 3 positions (3 brightnesses: 38 watt, 53 watt, and 68 watt), but I didn't really need all 3 settings. So I decided to go with a 2 position on-off-on switch. The low setting is now 43 watts, and the high setting is still 68 watts. This switch has 10 pins though, since it's a double-pull, double-throw switch. The upper 2 pins control the upper LED, the lower 2 pins control the lower LED, the middle 2 pins are the 2 inputs, and the other 4 pins are the outputs. The resistor values you see there are what control the HID brightness. I also stocked up the wiring a little bit by daisy-chaining some wires together, so that I only had one ground and one hot coming off the switch instead of 2.  Roo Burner Switch Wiring Roo Burner Switch Wiring by gold94corolla, on Flickr Originally, the lower blue LED was supposed to turn on to indicate that the switch was "on" in high brightness mode (you can see the little red jumper wire up there) but the problem is that the actual voltage coming from and going to the ballasts was so tiny that it didn't power the LED. So it didn't work. I had to redo it all, using a large DPDT relay instead of the switch. So now, the HID brightness control runs through the relay instead, and the switch is powered by the low beams themselves with 12 volts, so that the lower LED works. The output of the switch goes to the relay to trigger it, so essentially, it's like one big switch. Each flip of the switch make the relay click. Of course, the switch ONLY works when the low beams are on.... what's the point of powering the lower indicator LED if the head lights aren't lit? I also stocked up the wiring to the other switches by redoing the crimps so that they daisy chained the common grounds and hots.  Huge DPDT Relay Added Huge DPDT Relay Added by gold94corolla, on Flickr Yes that's a lot of mess, I do with these switches had harnesses, but it's not so bad. The relay just tucks behind there, and the dash easily fits back together. Now everything is complete and working perfectly! Looks and feels amazing.  Switches Complete Switches Complete by gold94corolla, on Flickr When the key is turned:  Switches Lit Switches Lit by gold94corolla, on Flickr Bottom of the middle switch lights up when the low beams are on AND the switch is flipped on, regardless of key position:  Roo Burner Switch Works! Roo Burner Switch Works! by gold94corolla, on Flickr (yes I got that switch because it has a kangaroo on it lol..... the idea behind "roo burners" is that, when flipped on, the lights are bright enough to incinerate any wildlife that jumps in front of me.... though that's just wishful thinking) |
|
|
|
Post by gold94corolla on Sept 11, 2014 22:40:38 GMT -5
Next up, in August, I finally got around to finishing my custom LED tail lights. I instantly loved the car again with these installed... gosh I hate the stock tails lol Inside is painted flat primer black (except for the reflectors), all of the LEDs have been replaced/upgraded for consistent brightness and longevity, and I added some red LED strips to use as DRL/rear fog light.  Completed LED Tail Lights Completed LED Tail Lights by gold94corolla, on Flickr Had to rewire the tail light harness to get the tail lights operating safely. The red wire runs to the "rear light" switch by the steering wheel.  PWM Installed PWM Installed by gold94corolla, on Flickr Flip the switch, and these light up:  DRL Lights DRL Lights by gold94corolla, on Flickr turn on the head lights, and they light up the same configuration as before, but better  Running Lights Running Lights by gold94corolla, on Flickr with the DRL on as well  Running & DRL Lights Running & DRL Lights by gold94corolla, on Flickr Brake lights are much brighter now  Brake Lights Brake Lights by gold94corolla, on Flickr Black finish inside matches the tires perfectly, just what I was going for  IMG_6566-2 IMG_6566-2 by gold94corolla, on Flickr More quick pics     IMG_6570-2 IMG_6570-2 by gold94corolla, on Flickr  IMG_6571-2 IMG_6571-2 by gold94corolla, on Flickr  IMG_6572-2 IMG_6572-2 by gold94corolla, on Flickr  IMG_6573-2 IMG_6573-2 by gold94corolla, on Flickr DRL on  LED Tails Lit LED Tails Lit by gold94corolla, on Flickr  LED Tails Close LED Tails Close by gold94corolla, on Flickr  Rear DRL On Rear DRL On by gold94corolla, on Flickr DRL + head lights  LEDs On Close LEDs On Close by gold94corolla, on Flickr  LEDs On Side LEDs On Side by gold94corolla, on Flickr |
|
|
|
Post by akuma64 on Sept 12, 2014 4:28:46 GMT -5
omg!! These upgrades are awesome! very nice! some bright ass L.E.D lights though lol Love the contrast of the tail lights and wheels
|
|
|
|
Post by 7thgen7a on Sept 12, 2014 19:38:13 GMT -5
Bro love the tail lights. I need to learn how to do that for my tail lights,I'm sure you done it to your rolla when you owned it.
|
|
|
|
Post by gold94corolla on Sept 12, 2014 19:57:49 GMT -5
Yeah I did several custom LED tail lights on the Corolla lol, been many years since I made a set though! This one took forever, and I think it will be my last for good. Thanks!
|
|
|
|
Post by CoroZilla on Sept 12, 2014 23:24:28 GMT -5
Wonderful change Chris
|
|
|
|
Post by gold94corolla on Sept 14, 2014 0:33:49 GMT -5
Another road trip! Spent a weekend driving down to Atlanta for TheRetrofitSource's open house. I didn't get any pics while I was there though lol. Took the usual route through South Carolina. Left my house at about 3:15 am, got here at 11 am. In South Carolina out in the middle of nowhere, I love it here so much. (all of the driving/scenery pics are unedited)        Then it was downpouring rain. 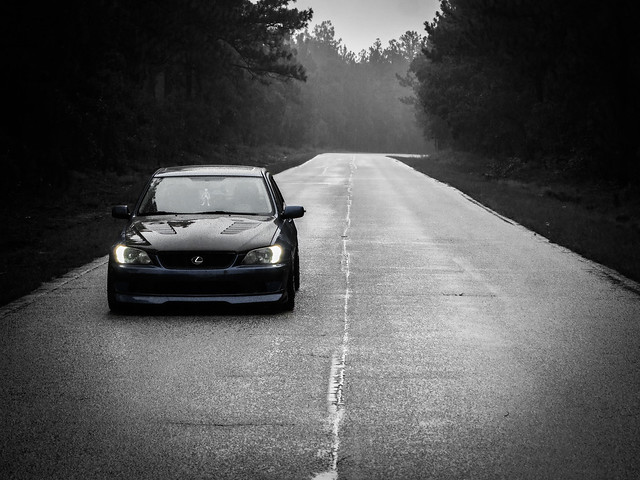  Stopped at the church to visit my grandmother's grave and put another solar light on it, the one I put there last year still works!  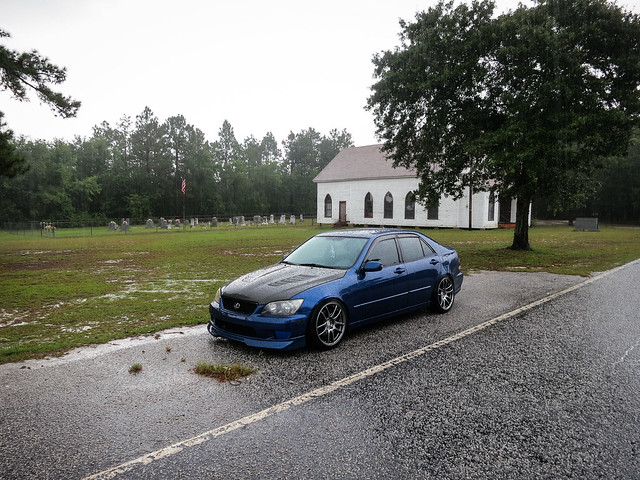  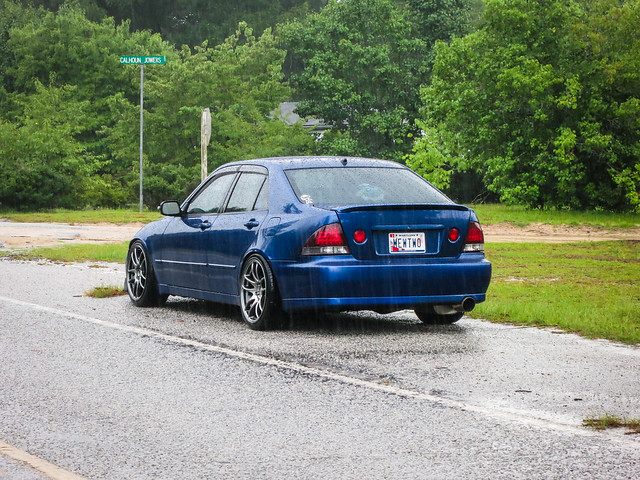 This dog is tied to the tree literally every single time I've ever been here (it's a long rope though)... even in the rain, poor thing  Then got to TRS at about 4:45 (took a quick nap at 1:30). Had a great time there! Ended up driving 3 hours north afterwards, and by the time I got to the place I wanted to sleep for the night, it was after 1am, and literally every place was either full or closed. WTF? So I slept in the car lol.... saved a bit of money, and it wasn't so bad actually. Left at 7am for the Blue Ridge Parkway. It was still rainy, so the Parkway was enshrouded with clouds for the longest time, could barely see anything lol.    Some heavily-edited pics.... without editing, you can't see the car the fog was so thick 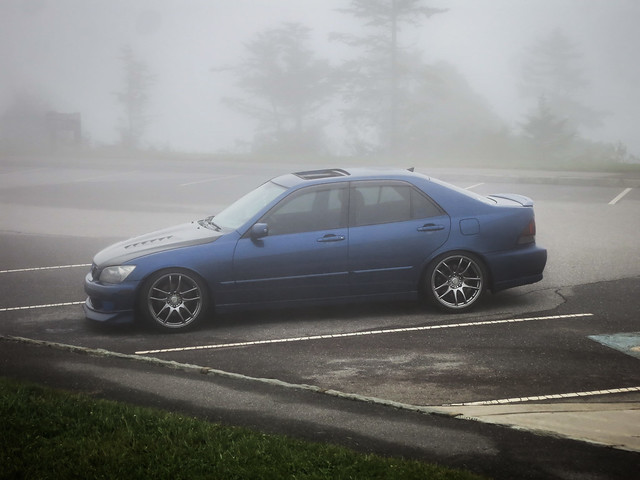  Two less- edited pics 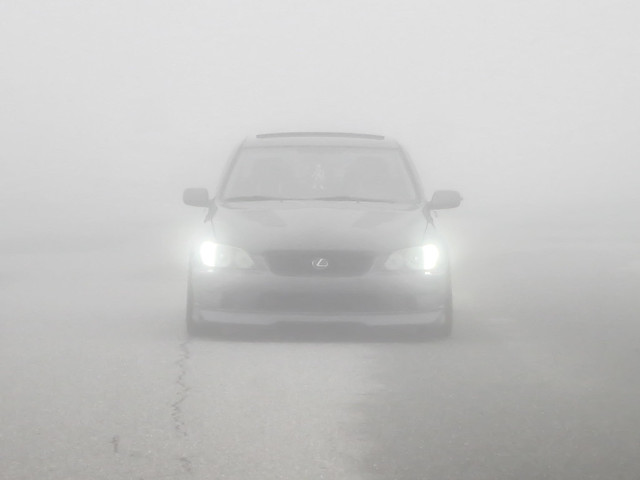 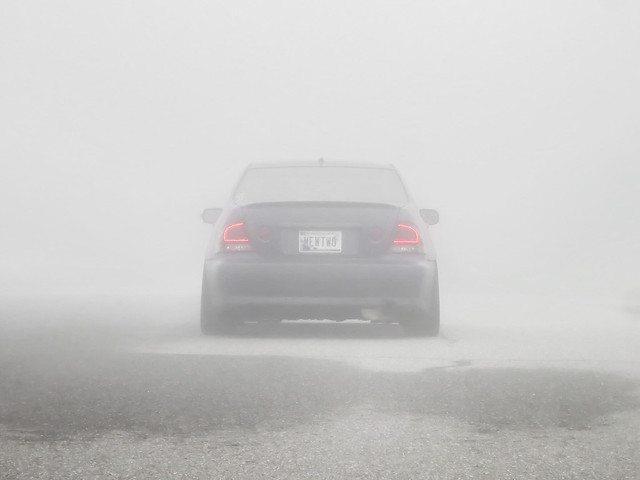 More edited pics. 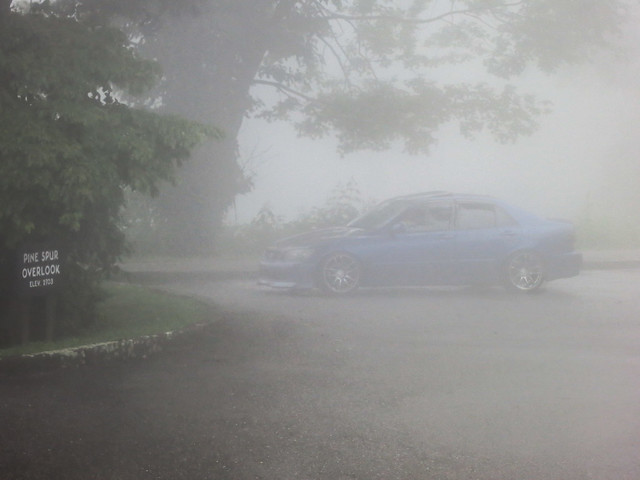   No spectacular views this time, just clouds. Like literally clouds, not just fog, but clouds lol.  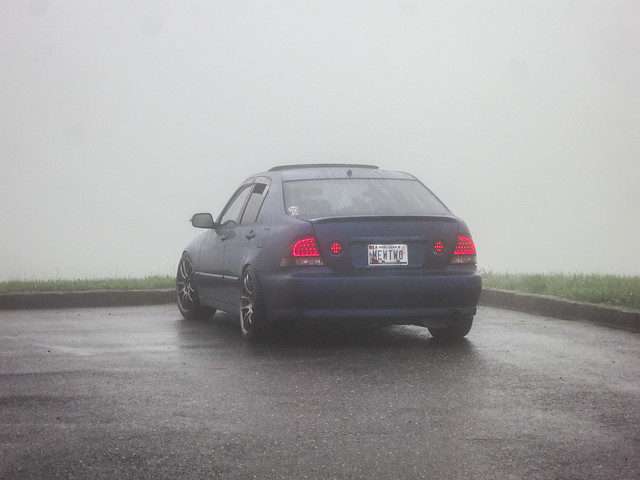 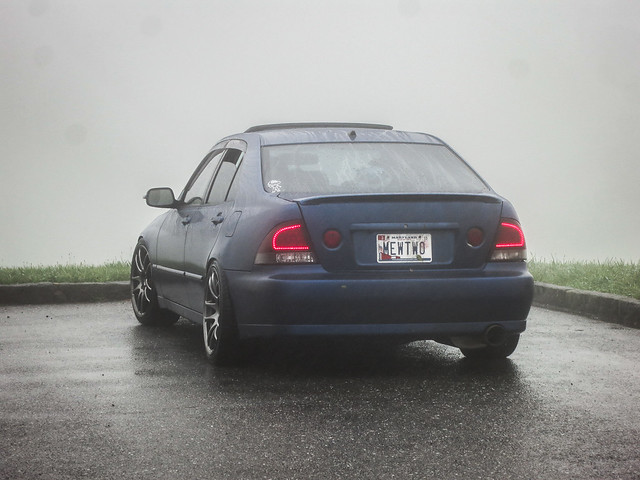     A break in the clouds gave a little bit of a view    It finally cleared up towards the end though, so I was able to get a good sunset pic. 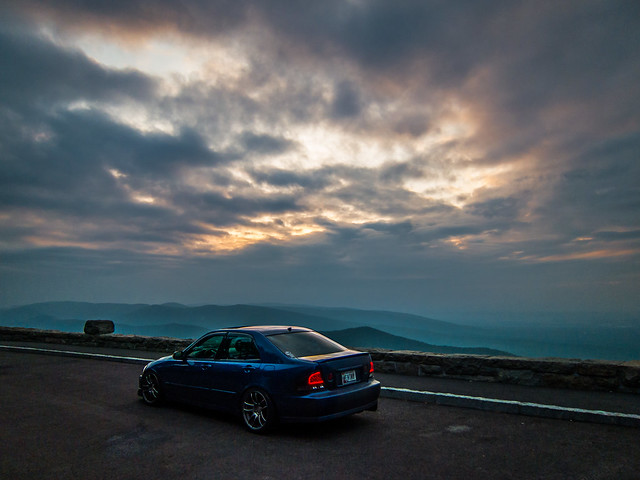 Got home after dark to make for a nice weekend. |
|
|
|
Post by CoroZilla on Sept 14, 2014 2:04:46 GMT -5
Your shots almost killed me  |
|
|
|
Post by Rinconrolla on Sept 14, 2014 6:54:36 GMT -5
Bro your photos are amazing !!! I want to know how you did the LED tail lights - Put DIY please lol - Just to let you know I'm taing some of your photos and puttting them up on CCC facebook and people are loving it
|
|
|
|
Post by gold94corolla on Sept 14, 2014 18:28:39 GMT -5
^^^ I'll put up a DIY on here sure! Thanks for sharing stuff on Facebook, since I can't lol Your shots almost killed me lol I'll have to aim somewhere else next time!! |
|
|
|
Post by gold94corolla on Sept 28, 2014 1:29:57 GMT -5
Earlier this month, I finally did the work to convert the JDM mirrors from RHD to LHD. It was just a matter of swapping the bases... I got lucky, and everything lined up perfectly!  USA Mirrors Disassembled USA Mirrors Disassembled by gold94corolla, on Flickr  LHD Conversion Complete LHD Conversion Complete by gold94corolla, on Flickr Then the mirrors installed easily... just a matter of bolting them on.  Completed Mirrors 1 Completed Mirrors 1 by gold94corolla, on Flickr  Completed Mirrors 2 Completed Mirrors 2 by gold94corolla, on Flickr I LOVE how they look. The signals are perfectly level in the mirrors, no weird angle to them. And the covers don't look too big or anything. Certainly looks better than the weird lights I had drilled into the old mirrors lol. Next up was a TON of wiring. First, I had to cut off the old power mirror switch and solder on the new harness. Same thing with the mirror harnesses. With the harnesses swapped, the new mirror switch and mirrors plugged into the stock harness. Next was to get the signals and folding operational. Because the USA mirrors have 2 functions that the JDM mirrors do not have (heated surface and autodimming), that gave me 4 extra wires in the harness to use for the signal and folding. So, I didn't have to run any extra wires through the door harnesses. I did have to run wires from one side of the car to the other under the dash though. 2 wires for the power folding on the passenger side, and 1 wire for the signal. Both signal wires come out of the door harness, and then to the driver's kick panel, where they solder to the wires going to the instrument cluster turn signal indicator arrows. The folding is all self contained though, so the driver's side folded without any extra wiring. The passenger side just had to be connected to the switch in order to operate. Push the button in, and the mirrors fold up!  Driver's Mirror Folded Driver's Mirror Folded by gold94corolla, on Flickr  Passenger's Mirror Folded Passenger's Mirror Folded by gold94corolla, on Flickr And the signals work! They are visible from all angles.  LED Light Front LED Light Front by gold94corolla, on Flickr  LED Light Front Angle LED Light Front Angle by gold94corolla, on Flickr  LED Light Side LED Light Side by gold94corolla, on Flickr  LED Light Rear Angle LED Light Rear Angle by gold94corolla, on Flickr  LED Light Rear LED Light Rear by gold94corolla, on Flickr And here are some pics of the wiring lol...... you can just ignore these, or you can try and decipher them to understand how much work this was. 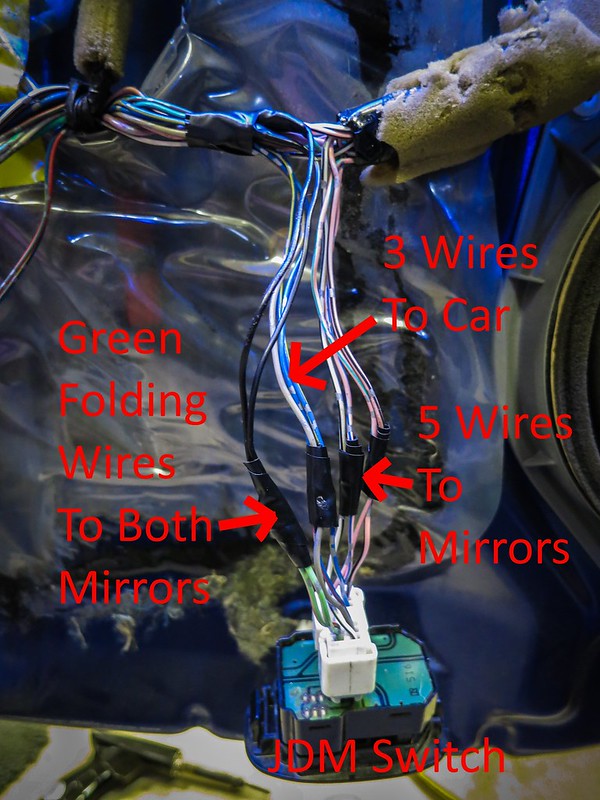 JDM Switch Wiring JDM Switch Wiring by gold94corolla, on Flickr 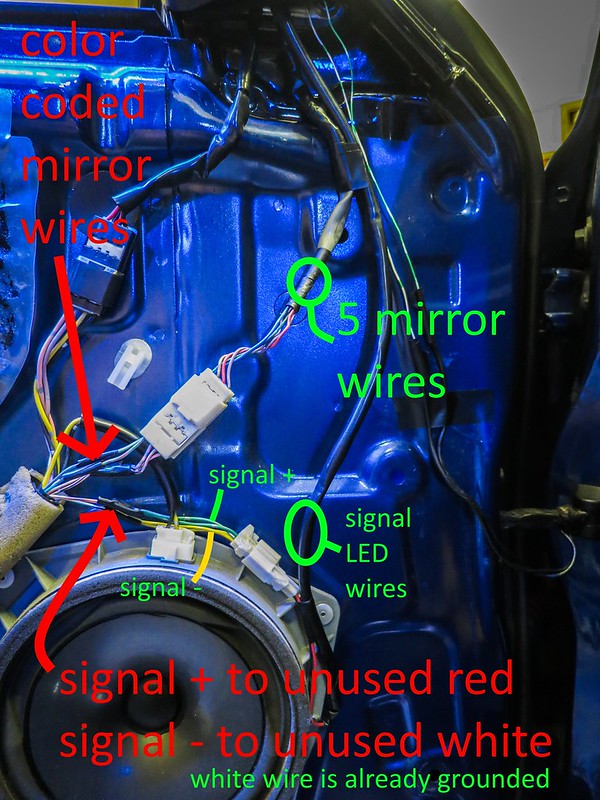 Driver Door Wires Driver Door Wires by gold94corolla, on Flickr 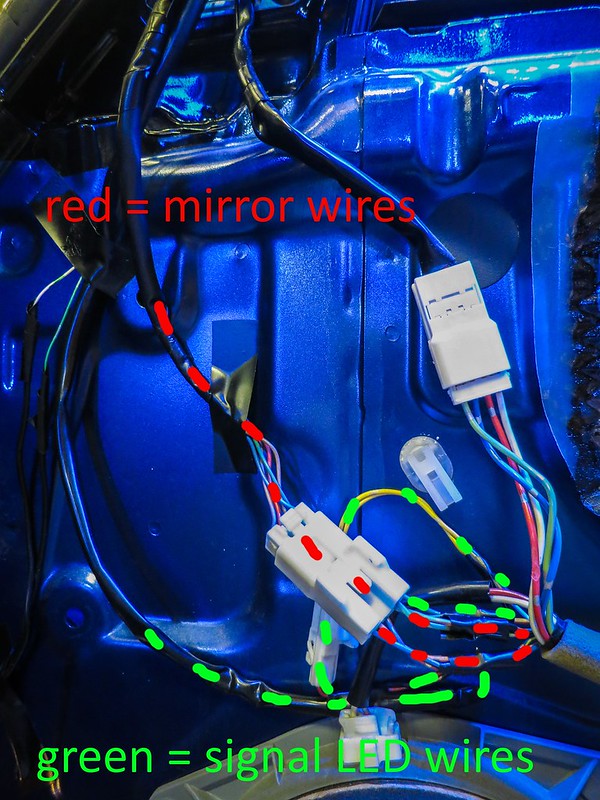 Passenger Door Wires Passenger Door Wires by gold94corolla, on Flickr 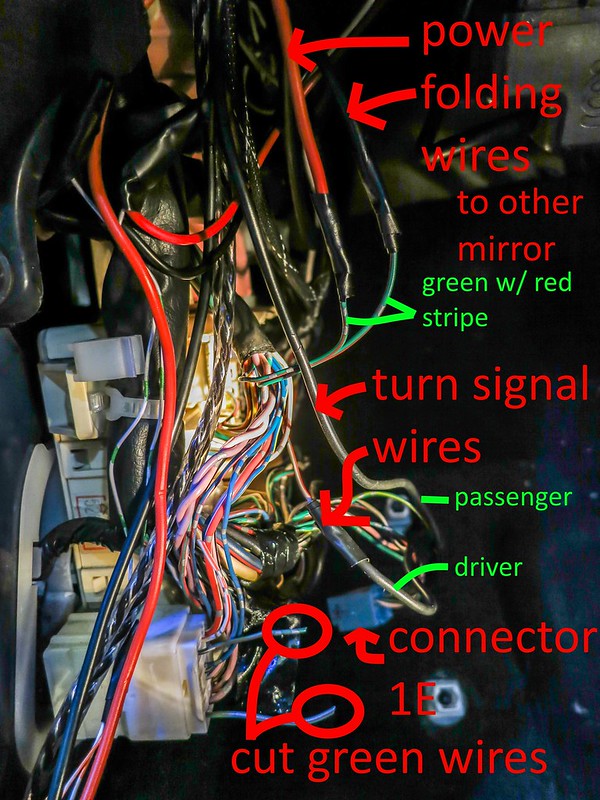 Driver Kick Panel Wires Driver Kick Panel Wires by gold94corolla, on Flickr 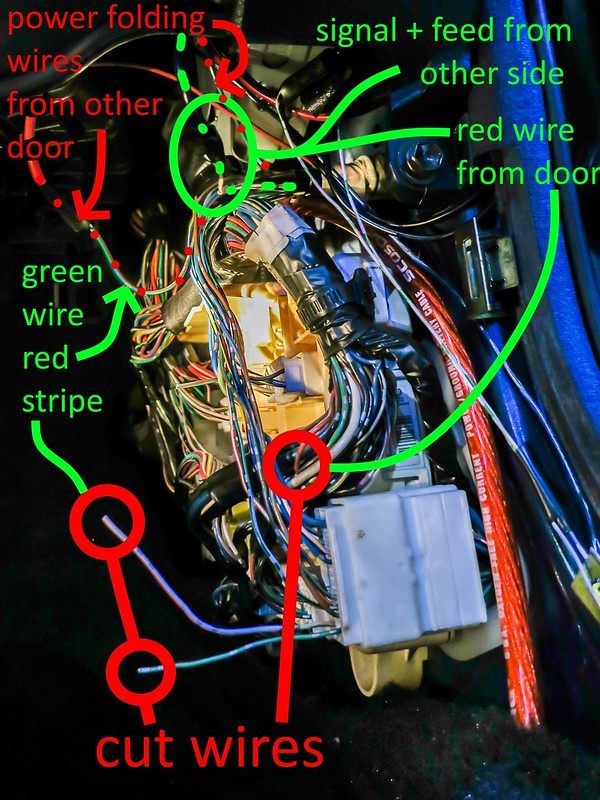 Passenger Kick Panel Wires Passenger Kick Panel Wires by gold94corolla, on Flickr I made a video of the car. You can see the tail lights and mirrors lighting up. You can hear the new exhaust. At the end, you can see how the mirrors fold. Not good quality, but here it is: And one last mod. While I had the door wiring exposed, I cut this wire to the driver's window switches.  Alarm Improvement Mod Alarm Improvement Mod by gold94corolla, on Flickr That was to improve the stock alarm. Before, if the alarm was armed, it would disarm if you manually unlocked it from the inside. So, if I left the windows open or someone broke the window, they could just reach in and turn off the alarm. Well, not anymore lol. And this thread is finally caught up lol. |
|
|
|
Post by 7thgen7a on Sept 28, 2014 17:46:57 GMT -5
The mirrors are awesome Chris.
|
|
|
|
Post by gold94corolla on Sept 28, 2014 18:35:52 GMT -5
thanks man, I never did get them for the Corolla lol
|
|
|
|
Post by akuma64 on Sept 28, 2014 22:42:55 GMT -5
maybe when i get them for the corolla ill just bring em up there to you so you can help me install em haha. Anyways, im always impressed everytime I come here. Plus..how te hell do you get to take so many vacations??!! WHen I graduate and get into m field I better get the same treatment haha
|
|
|
|
Post by akuma64 on Sept 28, 2014 22:43:14 GMT -5
BTW love those fog pics.
|
|
|
|
Post by gold94corolla on Sept 28, 2014 23:21:32 GMT -5
maybe when i get them for the corolla ill just bring em up there to you so you can help me install em haha. Anyways, im always impressed everytime I come here. Plus..how te hell do you get to take so many vacations??!! WHen I graduate and get into m field I better get the same treatment haha Well I remember seeing guys try and get the Corolla ones working, and it was a huge nightmare. Which is why I was scared to try mine, but converting them to LHD and wiring them up was cake lol. I'm not sure if the Corolla ones work the same way, but I would think that they do.... same switch, and almost the same year oh and I only take 2 vacations per year.... one week with the family, and 2 weeks doing my own "extreme" thing |
|
|
|
Post by Rinconrolla on Sept 30, 2014 9:10:21 GMT -5
Bro that is freaken awesome video , I love how the lights flashed - I want I want !!!
|
|


 Aww man, at least you tried. What are you planning to try next?
